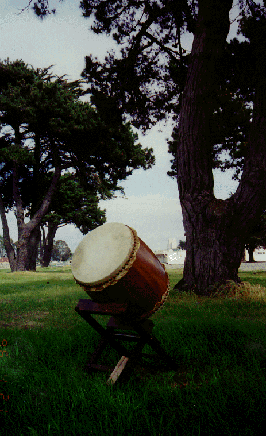
Making a Taiko From a Wine Barrel
Making a Taiko From a Wine Barrel
Making a Taiko From a Wine Barrel
STEP 1 - GLUING AND CUTTING THE BARREL TO SIZE
Things you will need:
1. circular saw, or a good sabre saw with a sharp blade
2. belt sander & various belts (60, 80, 120 grit)
3. electric drill
4. a tape measure
5. lots of sand paper - 80 grit, 120 grit, 180 grit, 220 grit.
6. a large bottle of wood glue
7. some small paint brushes for applying glue (1" wide is OK), a plastic dish
8. 2 plastic dishes (one for glue, one to rinse your brush)
9. 2 long bungie cords
10. a hard, flat surface for leveling the top and bottom edges after cutting
11. hammer
12. a flat-head screwdriver
Things not required, but good to have:
1. an adjustable square measure
2. wood planner
3. finishing sander
4. a level
5. a wood or hard rubber mallet
6. tack cloth
7. indelible marker
DRUM SIZES
First, you need to decide what size you want your finished drum to be. Most
large taikos are 22" high x 18" diameter, or 24" high x 20"
diameter. Wine barrels will come close to these measurements if cut correctly.
These dimensions may not be easy to reach, so you should try to come as
close a possible to these figures. If your drum is cut to a height of 24",
but the width of the top/bottom is 21" or 22", that may be the
best you can do. These figures are based on a formula that I found on some
marketing material from a Japanese taiko manufacturer. The formula is as
follows:
h = 2r +(2r/10*2.5)
r = radius
h = height
So all you math lovers can impress your friends. But, basically it comes
down to multiplying the height you want by 0.8 to get the best diameter.
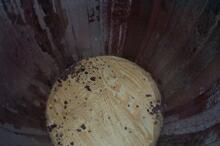
NOTE: the "bung hole"!?? If you are lucky enough to have scored
a barrel with no "bung hole" for tapping the wine, you can skip
this. If not, you have a couple of options. One is to replace the entire
stave with the bung hole in it. This may not be possible, but it makes for
a nicer drum. To do this you may have to sacrifice 1 barrel to replace the
staves. This will work if you are making many drums. The other option is
to take a piece of the ends you will cut off, and glue it into the hole.
If you do this, try your best to find a piece that matches the grain of
the wood around the hole.
MEASURING THE DRUM
To measure the top & bottom of the drum, simply pick the height which
seems right, let's use 24" as an example. Use a tape measure to find
the center of the drum on the outside. After marking the center, measure
12" from center to top and make a mark (use a good pencil or a marker
that won't rub off or smear with water), then repeat for the bottom (12"
+ 12" = 24" the height we want). Next, repeat this measuring process
on a few locations around the outside of the drum. This will be a guide
for marking the line for cutting the drum.
After marking, use an adjustable square measure (if available) and set the
square so that the bottom of the ruler edge is at the mark you made near
the top of the drum. You can now use the square to measure and mark around
the drum. If you don't have a square, use a tape measure and measure the
distance from the top edge of the barrel down to the mark you made. Let's
say it turns out to be 4". You will now have to make a series of marks
4" from the top edge in order to draw a line around the drum for cutting.
Repeat this process for the bottom. The bottom measurement should be very
close to the same distance as the top (4" in this example). If it is
not, then re-measure, you probably made an error somewhere.
After you have made your marks, connect them to get a solid line for cutting.
The more marks you make the easier this will be.
(NOTE: You may have metal bands in the way. If you can remove the bands
that are in the way without having the barrel come apart, then remove the
bands. If you cannot do this, you will have to glue the drum first, then
measure your lines).
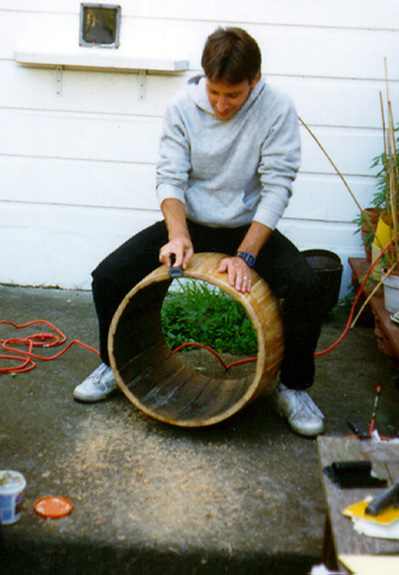
PREPARING THE BARREL
Before you glue your barrel you'll need to do a few things that will make your job easier,
and provide for better results. First, you will need to clean out the inside of the barrel.
You may find a little - or a lot - of wine residue hardened on the inside of the barrel. You
will need to scrape the inside of the staves clean using a wire brush, otherwise that residue
will complicate gluing the staves, and will likely fall off over time anyway. The last thing
you would want is to have that happen after you have skinned your taiko!
Aside from using a stiff wire brush, and cleaning the residue by hand, you can use a drill with
a paint stripping wheel or wire brush attachment. Remember to wear safety glasses and a dust mask
while using the drill attachments (or any power tool for that matter).
After you have cleaned the inside of the barrel, you should number the staves. Take an indelible marker
and number each stave. Put an arrow marking the direction you numbered them (clockwise is easiest). The
numbers act as a helpful reference point when working on your taiko. Also, if your staves were to fall
apart (the worst thing that can happen when gluing!), you can quickly put them back together in order.
GLUING THE DRUM

If your barrel has the wooden top & bottom boards on it, you should
remove them now. There are 2 ways to do this:
1. use a drill and drill holes in the boards, then use a sabre saw to cut
the boards up and pull them out.
2. pop off the end-hoops and pull the top and bottom out, then replace the
hoops.
Before gluing a warning - wood glue can dry fast, so you do not want your
drum to fall apart during gluing! It is a big mess if this happens (take
it from me). Also, it is easier to glue with another person helping. This
method is the best I have come up with so far:
1. Set your drum on a hard flat surface. Make sure you can safely make a
mess, because glue will drip everywhere. Get your glue, small paint brush,
a dish of water, hammer/mallet, screwdriver, and a hard piece of wood that
you can pound with the hammer. Pour some glue into a dish so you can easily dip your brush
and apply the glue quickly to the staves.
2. use a hammer or hard mallet and a hard piece of wood to pound the hoops
off the top of the barrel (a screwdriver will work, but can knick the barrel).
Try not to hit the wood of the drum with the hammer or you will knick it.
Normally barrels will have at least 4 hoops on them. You will want to take
the middle hoops off first, leaving the hoops on the ends until only the
top & bottom hoops remain.
3. decide which end you want to face up. This will be the end you take the
end-hoop off. The bottom hoop should stay on. Before hammering off the top
end-hoop, put a bungie cord around the top some where below the hoop. Put
another bungie cord on the bottom, just in case the bottom hoop slips off.
4. Now, you should be able to pull apart the staves of the barrel by stretching
the bungie cord. If you are working alone, place a piece of wood, or screwdriver
between the split staves.
5. Using the small brush, apply the glue to both sides of the staves. Work
the glue up and down the staves. Most importantly, don't skimp on the glue!
If you don't do a good job gluing, you will have a bigger headache re-gluing
staves that spit apart. Use the water to rinse the brush so glue doesn't
build up on it.
6. Working as quickly as you can, repeat this process for each stave. Remember
wood glue dries fast! Check the position of the staves as you glue. Use
your lines (for cutting) as a guide. Make sure the top edge is even, the
sides also. If you need to move a stave, use a hard mallet to pound the
stave into the correct position. If you don't have a mallet, wrap a hammer
in a towel (to protect the wood) and use it to move the staves.
7. Once you have completely glued the drum, use a rag or abrasive pad to
wipe off the excess glue. The more of the excess glue you remove, the easier
it will be to sand & finish the drum.
8. Finally, you need to replace the hoops and let the glue dry. When you
put them back on, make sure they are tight. You will see the glue ooze from
the cracks between the staves when they are tight. There is an "alternative"
way to do this if you have the time. In order to avoid some extra sanding,
you can place small pieces of wood between the hoop and the side of the
drum as you pound them back on. These will space the hoop away from the
drum so that the hoop won't scratch the wood, or cause glue to harden on
the hoop. You don't have to do this, but it may save you some time sanding.
9. After the glue has completely hardened (at least 48 hours), remove the hoops from the drum as in steps 2 & 3.
If you see the drum splitting apart don't take the last 2 end-hoops off!
You will have to re-glue the split staves by scraping out the glue in the
cracked staves, re-applying glue, then replacing the hoops. If you are faced
with this unfortunate event, you will have to be patient, you may have to
do this more than once (I had to do this 3 times on one drum).
10. If your drum stays together, congratulations! You are the parent of
a taiko. Now you know how Dr. Frankenstein felt about his monster.
CUTTING THE DRUM
Cutting the top & bottom of the drum will be tricky for those of you
who are not used to using a power saw. I would suggest that you practice
using the saw on some scrap wood before you cut your drum. If you make a
mistake cutting you may wind up with a lot of glued firewood.
I would suggest using a circular saw rather than a sabre saw (jigsaw). You can use
a sabre saw on a thin drum, but most larger wine barrels like the 24"
x 20" drum in this example, are too thick to be easily cut with a sabre saw. If you
decide to use a circular saw you should do the following before you start
cutting:
1. Set the blade so that only about 2 to 2.5" of blade are below the guide.
Too much blade will cause the saw to bind while cutting, and otherwise make
your job miserable.
2. Adjust the angle of the saw so that it rests against the curved side
of the barrel at an even angle.
3. Most importantly, try a few test cuts on the edge of the drum that will
be discarded to make sure you can cut smoothly. It will take you a few tries
to get the hang of the way the blade cuts through a circular surface. (Don't
forget to save some wood for the bung hole, if you need to fill it).
If you are going to be working alone, you will probably have to make a series
of cuts, rotating the drum as you go. It is just about impossible to make
a continuous cut unless another person turns the drum. Even with another
person helping, you may still have to make a series of cuts. Remember to
cut on the outside of the line, you can use a belt sander to even up the
edge after you have finished cutting.
After you have cut both ends, you will more than likely have to sand the
edges even. To do this with precision, I would recommend the following process:
1. Make/find a level hard flat surface.
2. Place your drum on the level plane, with a cut end up.
3. Use a level to find the low point of the edge. Then find the high points.
Mark the high points with a pencil.
4. Use a belt sander to even the edge, sanding the high points.
5. Flip the drum over and repeat this process on the other side.
6. Repeat this process as many times as needed until the level can be moved
across the drum evenly. Also, check to see if the drum wobbles when resting
on the ends. If the drum doesn't wobble & is relatively close to level
you're ready to sand the outside of the drum.
7. Use a belt sander to round off the edges on the outside of the top and
bottom. This will keep the skin from splitting when it is stretched over
the edge. Then round the inside edge. If you want to take the time, you
can try to angle the edges so that they slope inward.
STEP 2 - SANDING AND FINISHING THE DRUM
If you made it this far you are becoming a pro, however another warning
- sanding your drum may take many hours, make a mess, and make you unpopular
with your neighbors.
Things you will need:
1. belt sander
2. lots of sand paper - 80 grit, 120 grit, 180 grit, 220 grit.
3. a hard, flat surface for leveling the top and bottom edges after cutting
4. an old rug or blanket
5. wood putty
6. stain
7. exterior polyurethane
Things not required, but good to have:
1. wood plane
2. finishing sander
3. tack cloth
4. electric drill with a paint stripper or sanding wheel
5. fine steel wool
SANDING THE DRUM
Put your drum on a hard flat surface, put a rug or blanket under it to protect
it from scratches, turn it on its side. To start, use your belt sander with
an 80 grit belt (you can even use 60 but be careful not to dig into the
surface too much). Sand the drum with the grain of the staves, going top
to bottom in long even strokes. Work your way around the drum. Try to make
the surface as even as possible, you may have to use a wood plane to even
some of the staves. If you have a lot of glue stuck on the outside, it will
stick all over your belt, and eventually gum up the sander. If this happens
the best thing to do is use a wood plane or rasping file to remove the glue.
I have even used a drill with a paint stripper to remove excess glue. This
will make sanding much easier.
Continue sanding, changing from 80 grit to 120, 180.... If you have a finishing
sander, use it for the final finish (200 - 220 grit is good). If you don't
have a finishing sander you will have to do this step by hand. The more
you sand, the nicer your finish will be. After you have finished the outside,
take a minute to knock-off any pieces of glue on the inside that may come
off when you are playing your drum. You don't want these bouncing around
the inside after you have skinned your drum.
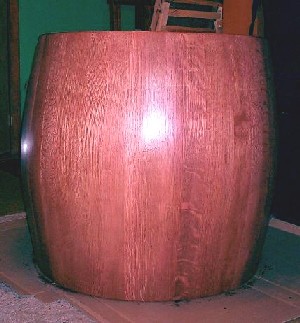
STAINING & FINISHING THE DRUM
NOTE: hoop stains - you try sanding them off, scraping them off, bleaching
them off.....Some old barrels will have stains in the wood where the hoops
were attached. You can spend a lot of time sanding and never really get
them out. I would suggest, if you run into this problem, take an easy way
out - use a dark stain on your drum. A dark stain will do a good job of
hiding hoop stains.
After sanding use a tack cloth to remove sawdust from the wood. Wipe down
both the outside and the inside. Next, apply the stain of your choice, you
may want to use 2 coats. I have had good results using a rag to apply the
stain. Aside from the warning about hoop stains (see above), the only other
comment I have about stain is that lighter colors tend to show the stave
lines on your drum. I saw a group playing some taiko that looked like they
had pinstripes on them. A nice effect on a suit, but ...
Next, look for holes that need to be filled-in with wood putty. I recommend
staining first, then finding a putty as close to your drum's color as possible.
You may have to sand the putty a little, and do some touch-up staining.
After the stain has dried polyurethane the drum. You should use an exterior
grade polyurethane. Put at least one coat on the inside, and 3 coats on
the outside. You should use fine sand paper or steel wool between coats.
Also, thin the final coat for best results.
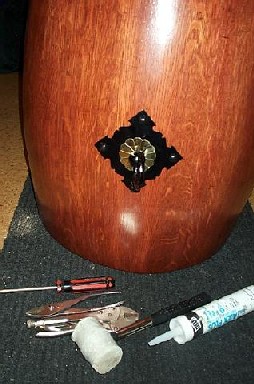
If you have handles you want to attach to the drum. You should drill your
holes and attach them after the final coat has had time to dry completely.
Now go get some sake, beer, kamikaze? & have a drink! You are ready
to skin your drum......
![]() Return to DIY Taiko Menu
Return to DIY Taiko Menu
![]() Purchase Taiko Making Supplies
Purchase Taiko Making Supplies
![]() Return to Tatsumaki Taiko's Homepage
Return to Tatsumaki Taiko's Homepage