Hi!
I am writing because I want to build a taiko drum and I am wondering if you can help me with some technical details. I was reading your page on do-it-yourself taiko's and read that the proportion of the diameter to the height is approximately 4/5.
1) What does this mean? Is the 'diameter' described the diameter of the head or of the drum at its widest point? Is the 'height', the measurement of the drum standing on end?
**A - the diameter is the end of the drum, not
the middle. The height is from top to bottom standing upright (end to end).
2) What is the mathematical relationship between those two diameters in a typical taiko? (The one I want to build will be 800 mm at its widest point so it will still pass through a typical Australian household doorway, so if you can tell me the head diameter for that size, I can cut my staves to the proper shape)
**A - According to Japanese taiko dimensions, the best proportions between the diameter at the end (smallest) vs the diameter at the middle (widest) would be about 15%. So a diameter of 800mm at the widest point would be about 680mm at the end. You should check this against a wine barrel, since the proportions on a wine barrel are about the same as a taiko. Although Japanese taiko are wider in the middle than a taiko made from a wine barrel.
Here are some sample measurements:
Height = 1000mm
end = 800mm (which is 1000 * .8)
middle (widest point) = 920mm (1000 * .92)
Height = 870mm
end = 696mm (which is 870 * .8)
middle (widest point) = 800mm (870 * .92)
Height = 26 inches
end = about 21 inches (which is 26 * .8)
middle (widest point) = 24 inches (26 * .92)
3) I will probably be using "Black-bean" timber, a dense native hardwood that comes from Australia, described as being somewhat denser than American "White Ash", and depending on your answer to question 1, I assume the height of the drum when it stands on end will be approximately 1 meter or less, what thickness do you think the walls of the drum should be? And what size tacks should I order and how many?
**A - About the thickness, the staves need to
be at least 25mm at the very ends of the stave. For a drum the size you
are making, you must use large tacks. (Mediums probably won't take the
stress of the skin). You are going to need about 360 tacks.
4) I can get the timber I need in 47 mm or 70 mm width for cutting the staves out of. Which do you recommend?
**A - I would use a larger stave for a larger
taiko, so 70mm.
5) I am planning to use the drum as part of my work with hyperactive boys in music therapy and therefore the heads will need to be very tough. Are your heads pre-stretched? Do they come with plans for putting them on?
**A - I use raw unbleached cowhide. All taiko
are traditionally skinned with cowhide. I would check for a place somewhere
in Australia since importing cow hide may end up being expensive. Sometimes
there are restrictions on that kind of item. See if you can find a source
near you. You need large clean & shaved hides, NO SCARS, NO HOLES.
Find the largest pieces you can, since you need a piece that is about 18
inches bigger than the diameter of your drum. Please see our Skinning
a Taiko page for more information.
6) I see that some models appear to have one handle and some seem to have two. Why is there a difference? What size handle do you think I should order for a drum of this size?
**A - A drum your size (80 cm diameter) will need 4 handles, since 2 people will have to pick it up. Taiko that measure 40 cm to 65 cm should have 2 handles. Sometimes taiko 70 cm have 3 handles. Only very small ones have 1 handle. You can use 4 medium handles (12cm bracket). As for the prices I have them listed on my web site, please check our DIY Kit Price List page for more information.
I know this is a lot of questions, but I want to make sure I 'get it right ' the first time, so I need to be sure.
Hi Phil!
Today my drum is on the way to being finished. One of my students is air brushing the body outside. Because it is my favorite color my drums are all dark red. I also now have 5 hydraulic jacks (each 5000 kp) for the skinning of the drum.
The 1st of my questions:
In your text "Skinning a Taiko" you say after first skinning: Repeat Step 5, wait 10 minutes, Repeat step five. If I use the hydraulic jacks, how much skinning time will be the correct way. One of the German drum builders told me by E-Mail, that he often needs some weeks of skinning the drum with the hydraulic jacks. He skins, let it dry, then use again water to soak the skin and then repeats the skinning procedure.
Using my hands with drum sticks for my first drum I need 3 days before nailing the skin. Can you clear this difference in timing by skinning?
My 2nd question:
If I make the pattern for the drumhead I see you use a measure of 32
marks around. The distance between the marks is always the same. In the
pictures of Japanese drums I see, that the distance between the marks (or
Lag Bolts) are nearly in the pattern: 4 cm 1 cm 4 cm - for one bolt. Do
I misunderstood here something? My 3rd (and last question) is.: If I cut
the rawhide and push the lag bolts through the holes by using a width of
the whole rawhide 16 " bigger than the drum head, I got a problem after
folding the rawhide after placing it on the drum head. Do I have to cut
something away after the pushing of all lag bolts? If yes, how much and
where I have to fit the rawhide to get the free place for the mimi?
1st Question:
In your text "Skinning a Taiko," you say after first skinning: "Repeat Step 5, wait 10 minutes, Repeat step five..."
**A - If you use jacks you only have to repeat
STEP 5- twisting the bachi 2 times (maybe 4 twists on each bachi and rope).
After that you can use the jacks to increase the tension. Remember to keep
the tension of the skin as even as possible all around the taiko. After each time
you crank up the jacks, wait at least 5-10 minutes before continuing. Put a wet towel on the
skin to keep it from drying out. After a few minutes, you need to stretch the skin. The traditional
method is to stand on top and bounce on the skin to stretch it. Next, pound down the "mimi" with a mallet,
and then crank up the jacks again, put the wet towel on, wait a few minutes & repeat. It is hard to describe
when to stop the tension, but the skin must be TIGHT! You just have to listen to the sound and decide when to stop.
Remember to make the skin tighter and the sound a higher pitch than you want - because the the
skin will stretch when you play it. For the best results, stretch the skin once - but do
not nail it on the taiko. After stretching, take off the skin and put it back
into water for another 24 hours. Then repeat the whole process.**
If I use the hydraulic jacks, how much skinning time will be correct. One of the German drum builders told me by E-Mail, that he often needs some weeks of skinning the drum with the hydraulic jacks. He skins, let it dry, then use again water to soak the skin and then repeats the skinning procedure...
**A - Your friend is right, if you skin it once
and then put the skins back into the water, and repeat the skinning it
will make the taiko sound much better. Remember when you finally do nail
the skin on to the body, make sure the tension is even all around, the
"mimi" is even all around, and that the skin is tighter & and the sound
a little higher pitch than you really want. The skin will stretch and the
pitch will lower after playing the taiko for a few weeks.**
Using my hands with drum sticks for my first drum I need 3 days before nailing the skin.
**A - You can wait 1 day to start nailing the
skin, that will let the "mimi" dry. If you do this make sure the "mimi"
is tight against the body of the drum, and not sticking out around the
edges. If it dries and it is not tight against the drum body, nailing the
tacks will be difficult, and the tacks may not be tight. You might also get a "buzz"
when hitting the taiko!**
2nd Question:
If I make the pattern for the drumhead I see, that you use a measure of 32 marks around. The distance between the marks is always the same. In the pictures of Japanese drums I see, that the distance between the marks or (for the dowels or lag bolts) are nearly in the pattern: 4 cm 1 cm 4 cm - for one bolt. Do I misunderstand here something?
**A - Those measurements should work. The hard part about measuring for the bolts is spacing them correctly. If the taiko has a big diameter, for example 70 cm or more, then the spacing will need to be adjusted. First, you will need to cut the hide into a circle (remember it must be bigger than the diameter of your taiko), divide your skin into 8 slices - like a pizza. Make 8 marks evenly spaced around the edge of your skin. You will need to measure carefully to make sure you have spaced each mark correctly.
Next, you will need to make the cuts for the bolts, the pattern you described will work: [cut] 4 cm space [cut] 1 cm space [cut] 4 cm space [cut]. The 1 cm space should be centered and in line with the 1st of your 8 marks. This will center the holes for the "mimi" (lag bolts or dowels). Also, remember the 4 holes you cut should be through the folded over "mimi."
After cutting your first set of 4 holes, find where the next bolt should be cut on the skin (the 8 marks), and repeat the pattern: [cut] 4 cm space [cut] 1 cm space [cut] 4 cm space [cut]. That should work OK. When a taiko gets to be very large, for example over 100 cm in diameter, you will need more bolts/dowles to stretch the skin. Example: 12 or 16 bolts/dowels instead of 8 bolts/dowels.**
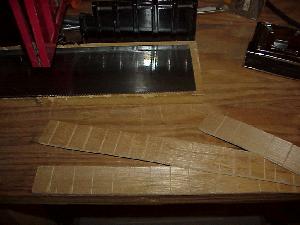
Here are some suggested patterns for cutting the "mimi":
18 inch diameter taiko:
[cut] 1.25 inches [cut] .75 inch [cut] 1.25 inches [cut] - (total length 3.25 inches)
22 inch diameter taiko:
[cut] 1.5 inches [cut] 1 inch [cut] 1.5 inches [cut] - (total length 4 inches)
3rd Question:
If I cut the rawhide and push the lag bolts through the holes by using a width of the whole rawhide 16" bigger than the drumhead, I got a problem after folding the rawhide after placing it on the drumhead. Do I have to cut something away after the pushing of all lag bolts? If yes, how much and where I have to fit the rawhide to get the free place for the "mimi"?
**A - I am not sure if I understand your question. I think you probably have
a little too much extra hide folded over(?). If you have followed my instructions and cut
your skin correctly, you should have folded the skin under (inside) all around the edges so that the "mimi" is 2 layers thick.
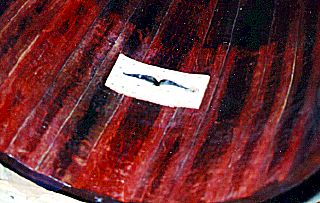
If you find you have too much excess skin, you may have to trim it. You can trim the
excess skin between the "mimi" - but do not cut too close to the "mimi" or you may
tear it when skinning! Please see the picture I am attaching, note how the skin
has been trimmed between each "mimi."**
I want to make a Hiradaiko, do you have any information or suggestions about how to make one? Do you know anything about the dimensions of the body?
**A - First I have to admit that I have never made a Hiradaiko myself, however I know several groups who have. I will tell you what I know.
1. Do not make the body out of anything but hardwood - oak, maple, etc.. Pine & other softwoods cannot handle the stress of the skin.
2. The body is usually described as being 1/4 the length of a nagado taiko. Therefore I would think using the formula I have on my "Making A Taiko" page; and then dividing the length by 4 would get you a good dimension. Although there are variations to the length of Hiradaiko! You should consider how thick (long) the body will be, how much space you need to nail down the skin & handles, and how well it will fit on its stand too. If the body is too small for the "mimi" and the size of the handles, you will have to adjust the dimensions. For example, if you make a Hiradaiko 24 inches in diameter, the body would be 7 inches high (according to the formula). That would not leave enough room for the "mimi" and handles. So, 10 inches would be more appropriate because it would allow enough space.
3. Several groups around SF have made Hiradaiko out of wine barrels that have been cut down. Whatever you decide to do, use a barrel or make your own staves - I would put reinforcing bands around the inside to keep the body from splitting. I use plywood on the inside of my taiko. I put a band around the top and one around the bottom. Then run some diagonal strips in the middle. You must do this for a Hiradaiko, or it will split!
Dear Phil,
I have glued my first barrel together but before I put the heads on
I would like to reinforce the barrel a bit more to keep the shape a bit
more solid. Any ideas on how or what I could do for reinforce it?
Thanks
**A - The way I have reinforced taiko made from wine barrels is to use strips of 1/4 inch thick plywood. The best wood to use is birch ply, if you can find it. You will want to cut the wood in to strips 1 inch to 1 1/2 inches wide. Make them at least 10 inches long. I have found it is easier to use a series of small strips to make a band, rather than 1 long piece.
You should glue and screw a band about 1 inch below the inside of the top & bottom of the drum. Stagger the seams of the strips so that you don't have a seam on either end, that meets at the same stave. If you know what I mean. It is a little hard to explain, but basically you do not want a weak spot in your bands. You will find that having lots of wood clamps will help you when doing this.

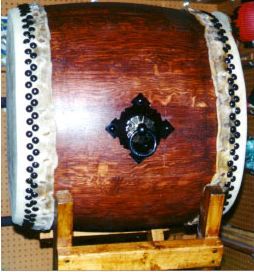
Note the wide horizontal piece in the middle to brace the handles.
Next, you will want to run strips at a diagonal angle on the inside of the drum. Run them across at least 3 staves. Glue, and screw these. Remember to pre-drill your screws, and use some that are not too long, or too short. Another trick is to use a hand saw to cut a series of grooves on the backs of your plywood strips. Not too deep though, just a little.
Cut a groove with a hand saw, space about every inch.
These grooves will let the plywood bend easier when you wrap the strips around the inside. Let me know how your drum works out.
Phil,
I want to purchase some handles for the taiko I am making, but I am not sure how to install them. Can you give me some instructions? Do the handles you sell come with instructions?
**A - Regarding instructions on putting the handles on your taiko. If you purchase them from us ("Perfect Harmony"), instructions for installation are included with the handles. If you have made or purchased handles from another source, then please look at this page:
http://users.lanminds.com/taikousa/traditional-2.html
you will see a diagram that may help you. I will suggest one thing, for a wine barrel taiko, you should reinforce the area around the inside of the drum with 3/8 or 1/4 plywood. I cut pieces about 4 1/2 inches wide by about 8 inches long. I glued and screwed them so that they were right in the middle of the hole drilled for the handle.
This plywood piece should run around the middle of the inside of the taiko and be screwed into each stave. This will reinforce the area where the stress will be when you pick up the taiko. The metal prongs on the end of the handle go inside, through the hole and are spread horizontal to the top & bottom edge of the taiko.
Hi
I found the article you wrote about making a wine barrel taiko extremely helpful and I started making one based on your information. I have completed the drum and have stretched and installed one of the heads. The hide has turned creamy on the top and on some of the sides - which I was expecting. However, some of the hide is still that clear color like a greasy paper bag. Does that clearness ever go away. On other drums I see, the heads and mimis are consistently the same cream color. Did I do something wrong?
Thank you.
**A - This is a common mistake made by everyone (including yours truly) when skinning your first taiko. The colors you mention indicate that the "creamy" side was tensioned OK. Although may be not as tight as Japanese manufactures tension their taiko - which is extremely tight. However, the "clear" "greasy paper bag" color means you did not tension the skin enough.
In order to skin your taiko correctly, you really need to follow these guidelines:
For more information, check these pages:
Taiko Do-It-Yourself Kits Making a Taiko Skinning a Taiko DIY Taiko Pictures Taiko Drummer's Dictionary
The Barrel Shop
Napa, CA USA
Email: barrelman@juno.com
The Barrel Shop sells used wine barrels, and has considerable experience
working with taiko groups. The "Barrel Shop" has barrels cut to taiko proportions in sizes ranging from 13 to 24 inches in diameter, and will also cut to order based on your specifications. They replace the stave that has the tap hole in it, so you will make a better taiko. They will even sand the body - for an extra charge. Their prices are competitive,
but they sometimes have a backlog on filling orders. Address your correspondence
to Ron Young (the owner). They ship worldwide.
Wine Business Exchange
Bulletin board postings for used wine barrels. Check the listings for location and price.
Web Site: http://winebusiness.com/UsedBarrels/UsedBarrelBoard.cfm
Wine Barrels 4 You
Email Orders to: winebarrels4you@uswest.net
Phone: (866)677-7656
Fax: (253) 288-0013
Web Site: http://www.users.uswest.net/~ajgilp/cellarpage.htm
"Wine Barrels 4 You" has connections locally and abroad which insures their ability to provide all clients with the highest quality end product. They have a web site, and say that if there is something you need that you don't see listed, they will try to get it for you. "Wine Barrels 4 You" asked to be linked to our site, so they are interested in supplying barrels for taiko construction.
World Cooperage Company
2557 Napa Valley Corporate Drive
Napa, CA 94558 USA
Phone: (707) 255-5900
Fax: (707) 255-5952
Email: contact@worldcooperage.com
Web Site: http://www.worldcooperage.com/index.html
World Cooperage Company, Inc. sells new barrels. They have contacted
us about listing them on our site, so they seem to be serious about marketing
to taiko groups. They have contacts around the world (check their web site) and a store in Napa, CA., and they will ship worldwide.
Taiko Jo
Joe Bowes
19230 Oakridge Drive,
Aromas, CA 95004 USA
Phone: (831) 726-1799
Joe Bowes is the taiko-maker for "Watsonville Taiko" and he has been making & selling taiko for many years.
Joe is now selling taiko skins too. He has his own exclusive source for hides and can even provide skins for "Odaiko."
We recommend him for those interested in the best quality!
Herman Oak Leather
PO Box 500087
St. Louis, MO 63150-0087 USA
Tel: (314) 421-1173
Tel: (800) 325-7950
Fax: (314) 421-6152
Herman Oak Leather is used by many taiko groups as a mail order supplier
for drum skins. They advertise skins prepared especially for drum making.
Hide and Leather House
595 Monroe Street
Napa, CA USA
Phone: (707) 255-6160
The Hide and Leather House carries a wide variety of hides. They have
some experience selling taiko drum skins, however be specific when ordering.
Make sure you tell them what size you need, and that the hide is for drum
skinning. We also suggest that you use unbleached rawhide (they carry both
bleached and unbleached).
United Rawhide MFG. CO.
1315 Linden Ave
Park Ridge, IL 60068 USA
Tel: ( 773) 276-1177
Fax: (773) 276-9535
United Rawhide has been making drum heads for many years. They provide hides for conga, snare drums, and other esoteric percussion instruments. They advertise a taiko grade rawhide skin, including hides for Odaiko.
![]() Return to DIY Taiko Menu
Return to DIY Taiko Menu
![]() Purchase Taiko Making Supplies
Purchase Taiko Making Supplies
![]() Return to Tatsumaki Taiko's Homepage
Return to Tatsumaki Taiko's Homepage
updated: 1/2/2023 by Tatsumaki Taiko