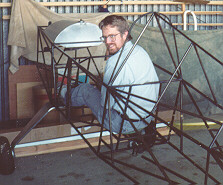
Please see my article for why I chose a Sonerai. I found my project at the Nut Tree Air Fair in the Fall of 1992, just as I was coming to the conclusion that the Sonerai was the plane for me. The seller had it posted on a flyer at his table of treasures/junk. My fiance (later wife, now ex-wife) and I flew up to Ukiah to check it out, here I am making motor noises. In spite of the look on my face, I was ready to walk away and think about it, Sandy said "Buy it, you want it, you deserve it, you can afford it."
For $3000 I got a mostly welded fuselage (look carefully in the picture, and you can see that the diagonal brace alongside the aft cockpit is missing), finished tail feathers, a complete hardware kit, landing gear, a complete wing kit, and some miscellaneous materials. No engine, no prop, no covering materials. The quality of the work that had been done was pretty good, and I saved a bundle over what the materials would have cost me, or even what the original purchaser paid for them. I think I'm the third owner of the project.
When I bought the project, I had a one car garage. It was a struggle to get it all in, but I managed. The pictures from that era didn't scan, come visit sometime and I'll show you how I did it.
Looking through EAA chapter newsletters (our chapter exchanged
with many West Coast chapters) I found a HAPI VW conversion for
sale in Gilroy at the Antique Aviators future museum. Somebody
had donated their project, an overgrown and overweight 2 place
composite ultralight, that I hope never flew. But it had a new
engine on it I could have for 1/2 list, another $3K.
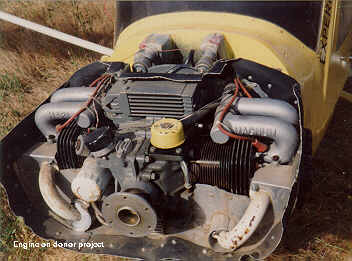
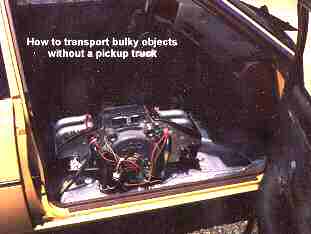
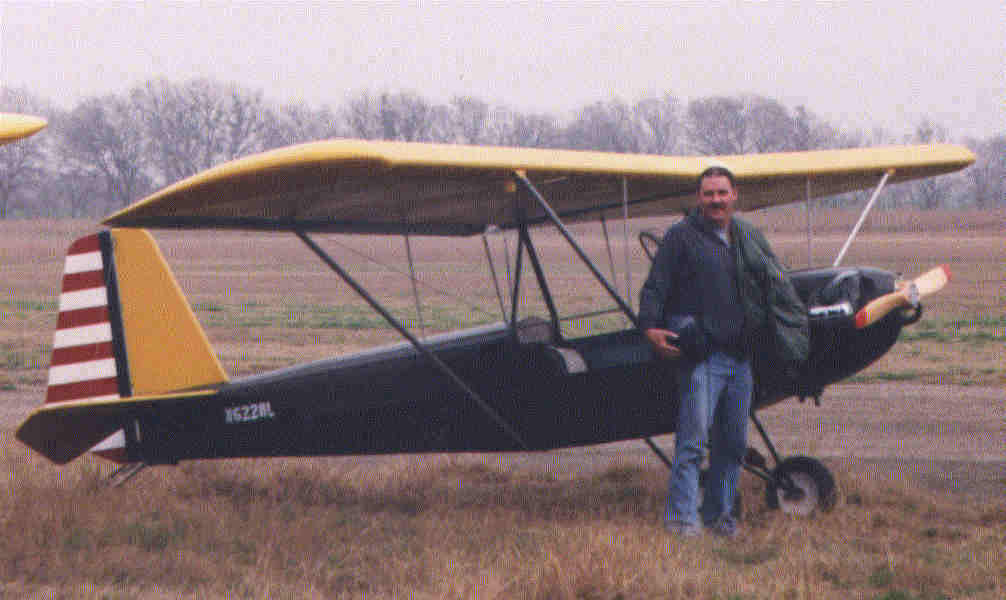
I pulled it, and everything having to do with it, (vernier
throttle, mixture, instruments, prop, the complete firewall
forward) off this yellow peril on the hottest day of the year in
the full California sun, and used this "poorboy pickup"
technique to get it home.
Notice there's no magneto, this engine has a single electronic ignition.
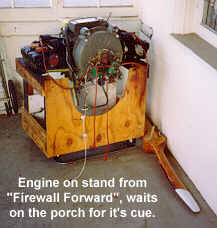
I made this engine stand to store my treasure until time to install it. It's copied straight out of one of Bingelis' books, probably "Firewall Forward". Use lag screws or bolts to put your's together, not nails or drywall screws (how do I know this? I'll let you guess...). I "Pickled" the engine by making covers for the intakes and exhausts, and basically filling the cylinders and the crankcase with Stits preservative oil. Note the drip pan under the stand. It's there for a reason. The beautiful Warnke prop is too long and has too little pitch for a Sonerai, I sold it to a guy in Canada, over the Internet, another long and terrible tale, albeit with a happy ending.
Another thing I did in the beginning was gather tools. Frankly, I gathered too many tools in some areas, and not enough in others. This applies to materials as well, for example, my engine. Here it is 4 years later, and I still don't need an engine in order to make progress.
But I digress (get used to it). Tools: I already had drill motors, wrenches, that sort of stuff. Clecos I got from Airparts. I bought a Delta (made in Brazil) bench mounted drillpress, which was a minor mistake. You absolutely need a drill press, but a floor mount won't steal your precious bench space. I decided not to buy a band saw, which many will tell you is indispensable for metal fab. I had the loan of a high end Bosch variable speed jig saw, which takes a world of different very high quality blades, including metal cutting. With patience and lubrication, I can cut circles in .090 chrome moly, and it takes up no space when not in use, critical in my first garage, and still an issue in my present 2 car garage. So you don't need a bandsaw if you have a good enough sabre saw. When my buddy asked for his saw back, I bought a slightly used model at a pawn shop to replace it. A cheap bench grinder (too cheap, the switch failed almost immediately, and the bearings are going), and the usual drill motors (several, so you can drill and countersink without having to un-chuck, and cordless driver/drill with a keyless chuck is really sweet tool) round out my power tools.
As a Mr Fixit from way back, I had a fair collection of hand tools, most of which were stolen (and replaced) shortly after I got the project. The special stuff I bought included clecos and pliers, a fluting plier, micrometer countersink (used), a flanging tool, a little bending brake (which was messed up, but US Air Parts fixed it free more than a year after I bought it), a neat access hole cutter. I also made a hardwood "flange tweaker" to help straighten the rib flanges (see Bingelis for details) and an aluminum bending block that actually saw more use than the brake.
Materials, tools, what else? Information. The plans are only the start. I found every one of Tony Bingelis' books very helpful. The EAA welding video is another keeper. I keep the Fletcher Aircraft Workers Manual close by my work for bend allowances, drill sizes, AN hardware information, etc (although Bingelis has this stuff too, it's scattered, and the Fletcher book is pocket sized). There are several motorsports books I found briming with good ideas. And my trip to Oshkosh was crucial. There were 15 Sonerai's there in '93. I spoke at length with the builders of each one, and took many pictures. I also stocked up on instruments, aircraft wire, SCAT tubing, circuit breakers, etc at rock bottom prices, attended forums on the Sonerai, VW engines, and took in the educational seminars on welding and sheet metal. I came away convinced I could build a nice airplane. Go, now. Hundreds of thousands of your closest friends will be there waiting for you.
Anyway, it took a while to set up my garage, then we spent a year getting married, then we moved, then I got sick, now we're expecting a child. We've got a pretty equal marriage, we both work, so we both do housework. I cook most nights. But these are only the obvious reasons why progress has been so slow.
Don't modify anything. Build it just like the plans say to build it. You won't follow this sound advice anymore than I did, and you will pay, as I did.
Every deviation from the plans will cost at least 100 hours of your time. This rule applies regardless of the stage of completion, or your level of skill. As you get more skilled, you'll attempt more ambitious mods. As you get closer to completion, you'll try, but fail, to eliminate unbuilding stuff to put in your "little tweak", but you will fail. 100 hours, it's the "Lyle Limit", after a fellow EAA chaper member who first clued me in. His heavily modified Glasair III has at least 6000 hours of his own time invested in it, even though he has every tool known to god, plenty of money for custom work, lots of helpful family and friends, and has built 3 airplanes before this one.
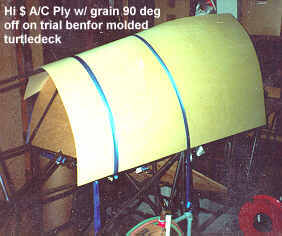
I blame Mark Elyea for my turtledeck. I never liked the plans version, and when I saw his drop-dead gorgeous airplane at Oshkosh, I knew I had to do mine like his, I.E. softly rounded, and arranged so that the canopy skirt can overlap the turtledeck for a nice seal, instead of the gap often seen at the aft end of most Sonerai's where it will shoot a high drag stream of evacuated cockpit air right into the boundary layer.
Mark did his T-Deck by male molding glass. I hate working glass. I like working wood, but a plywood deck that long would be heavy. I compromised: the first bay from the headrest back will be molded plywood, with .025 aluminum wrapped around the top, extending back to the tail, in the manner of the plans.
Well, the shape I needed was a little tricky. In order for the canopy to close right, the curve had to start off as an arc from the hinges. But the upper sections of the curve needed to be pushed out from that to get enough height to close the canopy, and there needed to be a smooth curve on top to avoid the "Zippy the Pinhead" look. I fiddled with cardboard patterns for weeks, got pretty close, then used AutoCad to finish the job. I was able to plot full-size patterns, scaling the headrest pattern accurately to get the next station aft, and also the canopy frame pattern. I cut temporary molds out of double wall cardboard, and used scrap mylar sheet to make a pattern for the plywood.
I had figured on using door skin plywood. Early experiments in boiling a small piece of it seemed to indicate I could torture it into the curves I'd need. Well, big pieces of plywood don't bend like little pieces. No amount of boiling water would allow me to curve the size sheet I needed.
Kerfing the back didn't help, nor did physically removing one of the three veneers in the tight area of the curve.
My next attempt: Steam. I built a steambox out of foil-backed insulation board, and supplied it with an old pressure cooker fired with a camp stove. 20 minutes should do it - utter failure.
Living in the San Francisco Bay Area has it's advantages, there are at least 3 places within 20 minutes drive with a wide selection of exotic plywood. So I bought a staggeringly expensive piece of fancy bending plywood, only to discover I had it cut with the grain running the wrong way, and it still won't make the curve unless I scarf it. The picture shows how with the ply wrapped in the "easy" direction, it come up short. I've scarfed ply before, it's do-able, but 3/32" ply is pretty thin to scarf. I may have to butt join it with a fiberglass overlay.. Time for another visit to the Moaning Chair.
There's some other stuff to notice in the picture before we leave it. The nylon web clamps holding the plywood down have come in very useful several times on the project, for holding the fuselage to the roof of a borrowed truck, to tweaking the fuselage enough to get an oddly missing diagonal brace in place with a nice tight miter at each end. Later I'll use them to pull the wing skins tight to the ribs. Treat yourself to a pair. You can see the aft cardboard mold in there. You probably can't see the rotating "barbeque spit" setup I have the fuselage in, but see Bingelis for details on making your own.
I needed to get the fuselage out of the garage in order to put in a new garage door hinge mechanism and opener a few summers ago, so I dragged it up the 30 stairs to my backyard. This was in July in Northern California. It never rains that time of year.
It rained, twice, before I could get the fuselage back in the garage.
So, even though I was not finished with all of the fuselage welding, and I had not stress relieved the clusters, I had to blast and paint. About $400 later, I had a gleaming with frame coated with 2 coats of Stirling urethane primer. Just in time to hang the frame from the ceiling to fit the new City-El electric vehicle in the garage. And we got pregnant.
As of 12 March 1999, I've worked on the project 4 hours in the last 16 months.
I may never live to see it finished at this rate.
So I put it up for sale. The bottom has dropped out of the market for Sonerai projects. I paid $3000 for the initial project pieces, $3000 for the engine, and I've probably put another $2000 in parts and pieces, supplies and materials since then. I started out asking $6000 for it, it's now $4000, and I'll make you a real nice deal if you live in my area code (or the next nearest ones) for a half-interest - $1500.
If it doesn't sell, I'll keep on plugging, hoping it will be done in time for my son to solo in it.
Until it sells or I start work on it again, the fuselage hangs
from the ceiling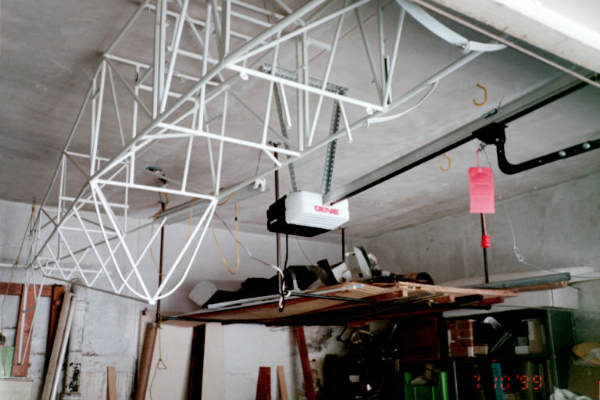 while the
engine weeps preservative oil underneath the sink.
while the
engine weeps preservative oil underneath the sink.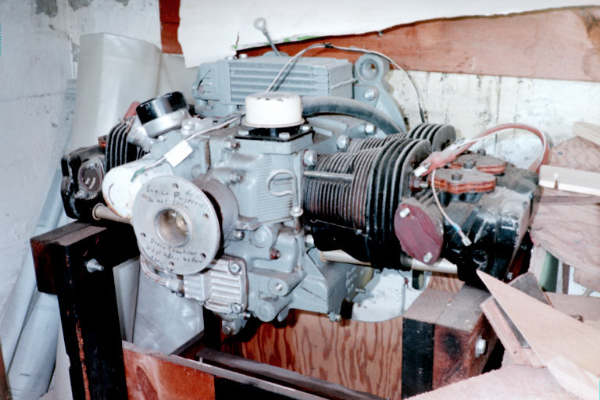
The project did finally sell for $4000, to a guy from Washington State. When his deal on a pickup fell through, he drive his Honda Civic down here to Oakland, twice, and hauled the whole deal back with him. I'm both relieved and depressed now that the project is gone. Relieved, because it was a self-esteem drain to have the damn thing sitting there, with no progress happening. Depressed, because building an airplane is really, really something I want to do before I leave this mortal plane, and I took a bath to the tune of about $5000 on this project, and ended up with nothing but memories.
There will be another project. One scheme is to start on a Sonex in 5-10 years, so I can build and fly with my son, who is now (winter 2000) nearly 2. Another idea is to start building a Chuckbird ASAP - something simple, cheap, with no welding.
I've started cutting aluminum for a Teenie Two.